Embedding Copilot Studio Agent in a SharePoint Page
Introduction
Embedding a Copilot Studio Agent within a SharePoint page can significantly enhance user experience by providing seamless access to AI-powered assistance directly within the context of a SharePoint site. While there are examples of achieving this using SPFx (SharePoint Framework), I wanted to explore whether this could be done using out-of-the-box (OOB) features without custom development.
In this blog post, I will walk you through the steps to embed a Copilot Studio Agent into a SharePoint page using the Embed Webpart and site settings.
Why Embed a Copilot Studio Agent?
Embedding a Copilot Studio Agent within a SharePoint page allows users to interact with AI agents directly from the page, improving productivity and accessibility. For example, you can embed agents for tasks like colleague feedback, HR assistance, or project management, making them readily available without switching between applications.
Steps to Embed a Copilot Studio Agent
1. Configure the Copilot Studio Agent Channel
Channels offer integration options for Copilot Studio Agent for example Microsoft Teams, Facebook or custom web site. The Custom Web Site can be used to generate a HTML Iframe code to embed within a SharePoint page.
Within the Copilot Studio, navigate to the Channels option for your agent. Select the Custom Web Site channel to generate a link for embedding the agent.
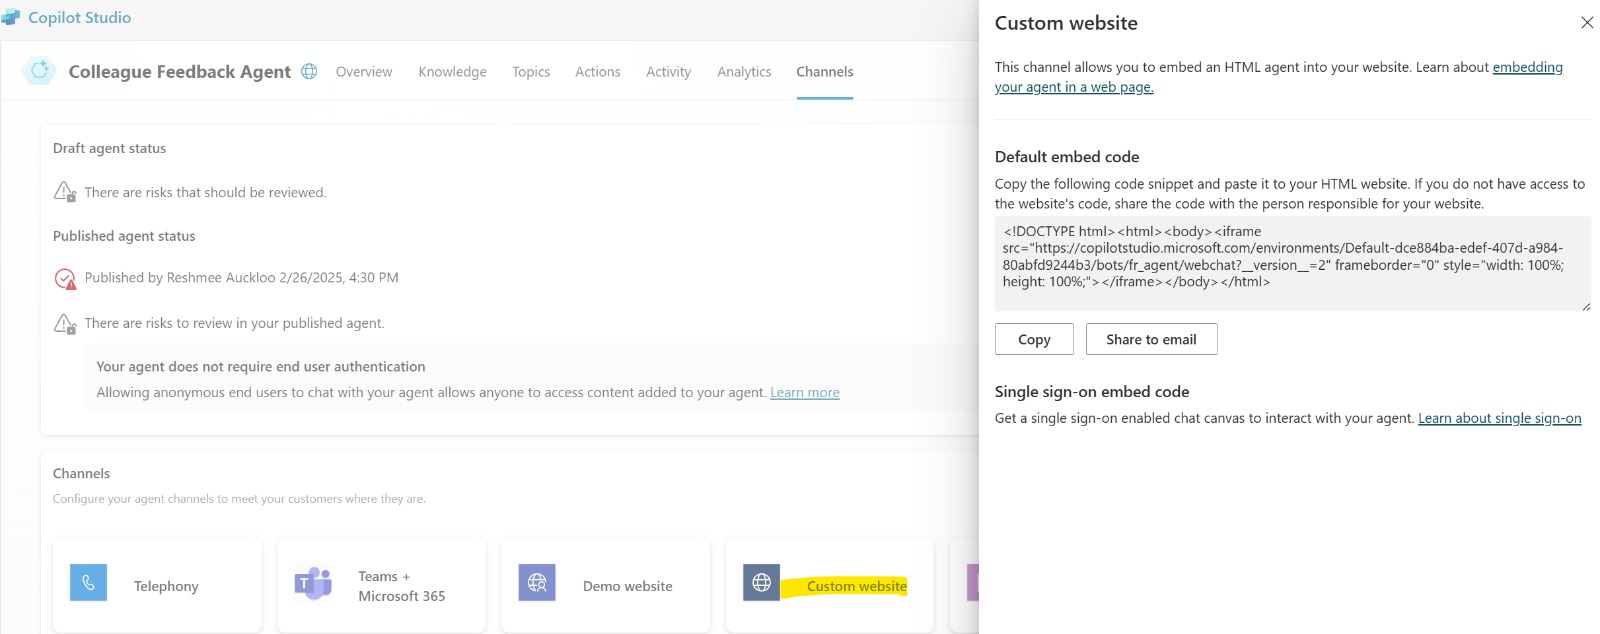
<iframe src="https://copilotstudio.microsoft.com/environments/Default-dce884ba-edef-407d-a984-80abfd9244b3/bots/fr_agent/webchat?__version__=2" frameborder="0" style="width: 100%; height: 100%;"></iframe>
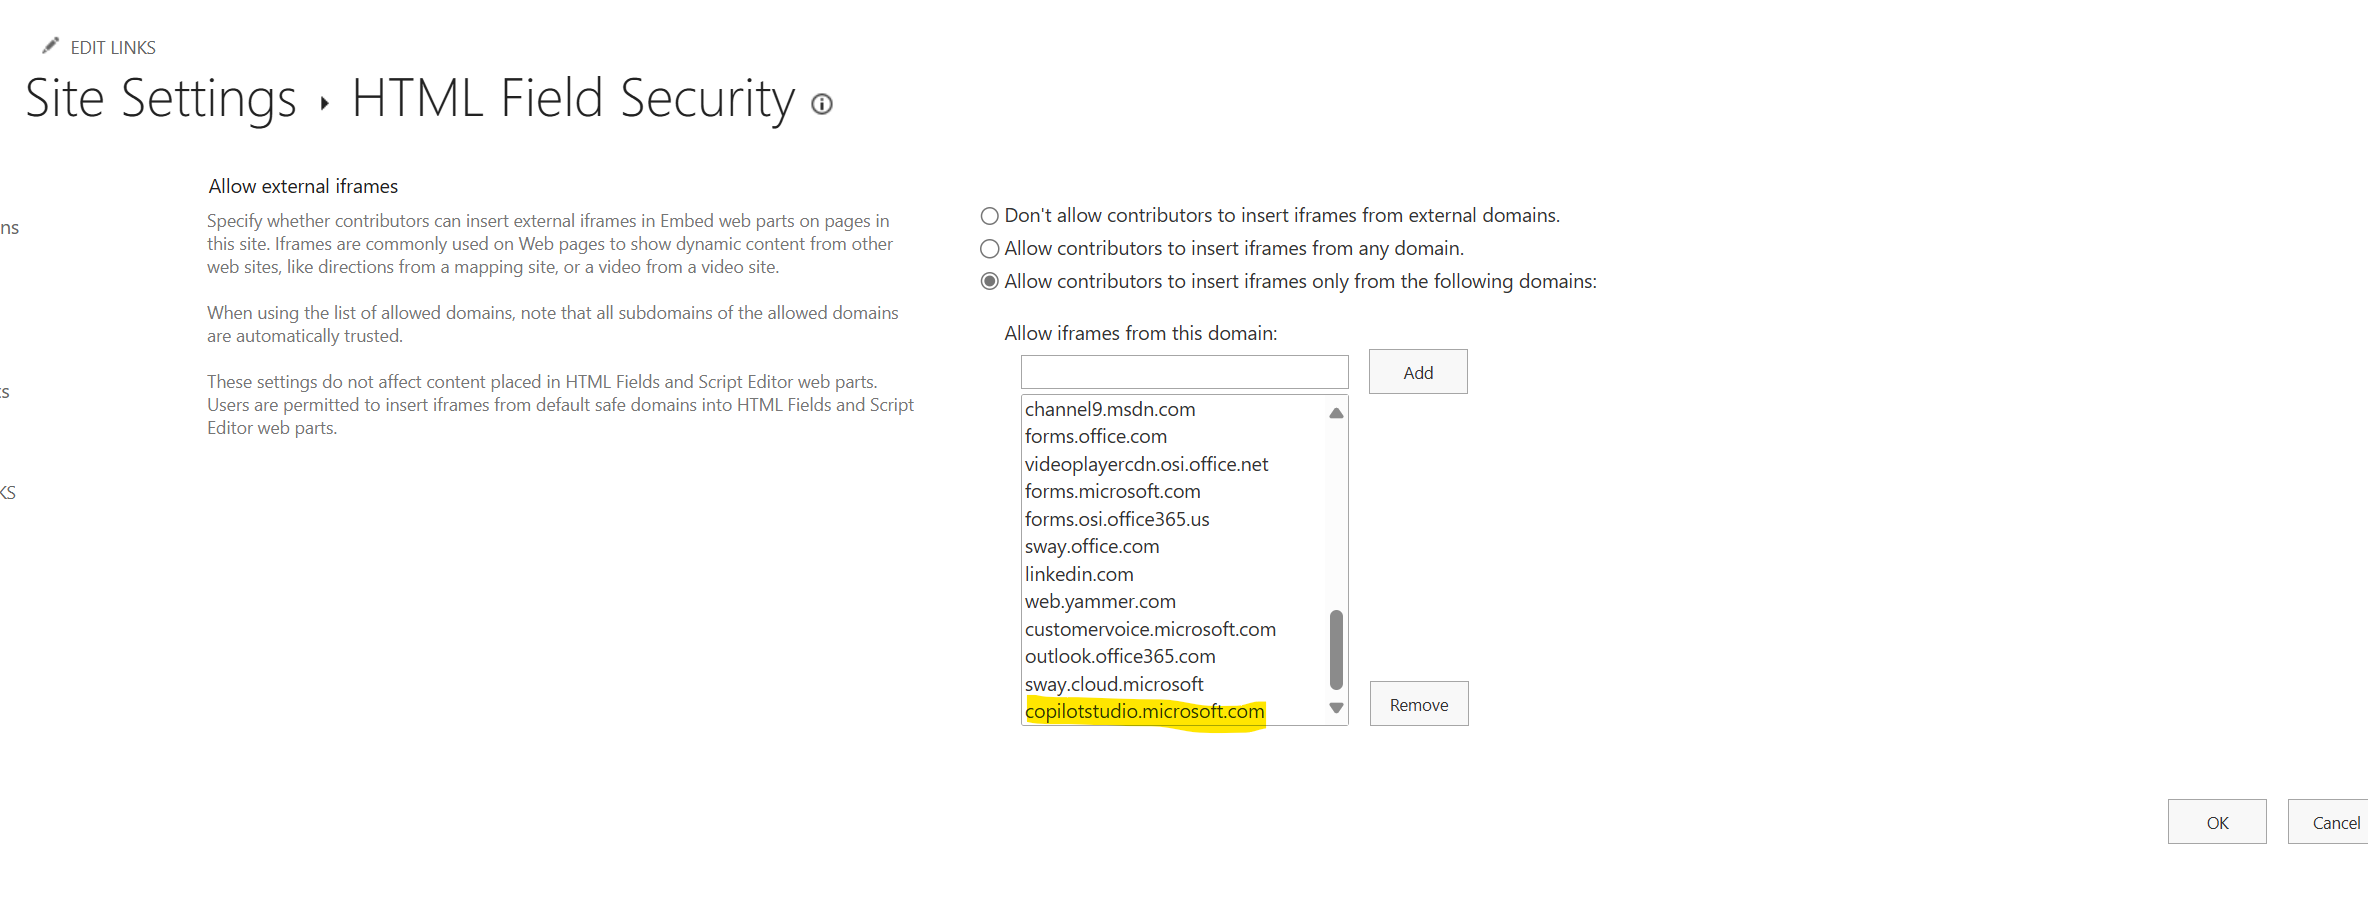
2. Allow Copilot Studio in HTML Field Security
To enable embedding, you need to add copilotstudio.microsoft.com to the list of allowed iframes in your SharePoint site settings.
- Go to Site Settings > HTML Field Security.
- Add
copilotstudio.microsoft.comto the list of allowed domains for iframes.
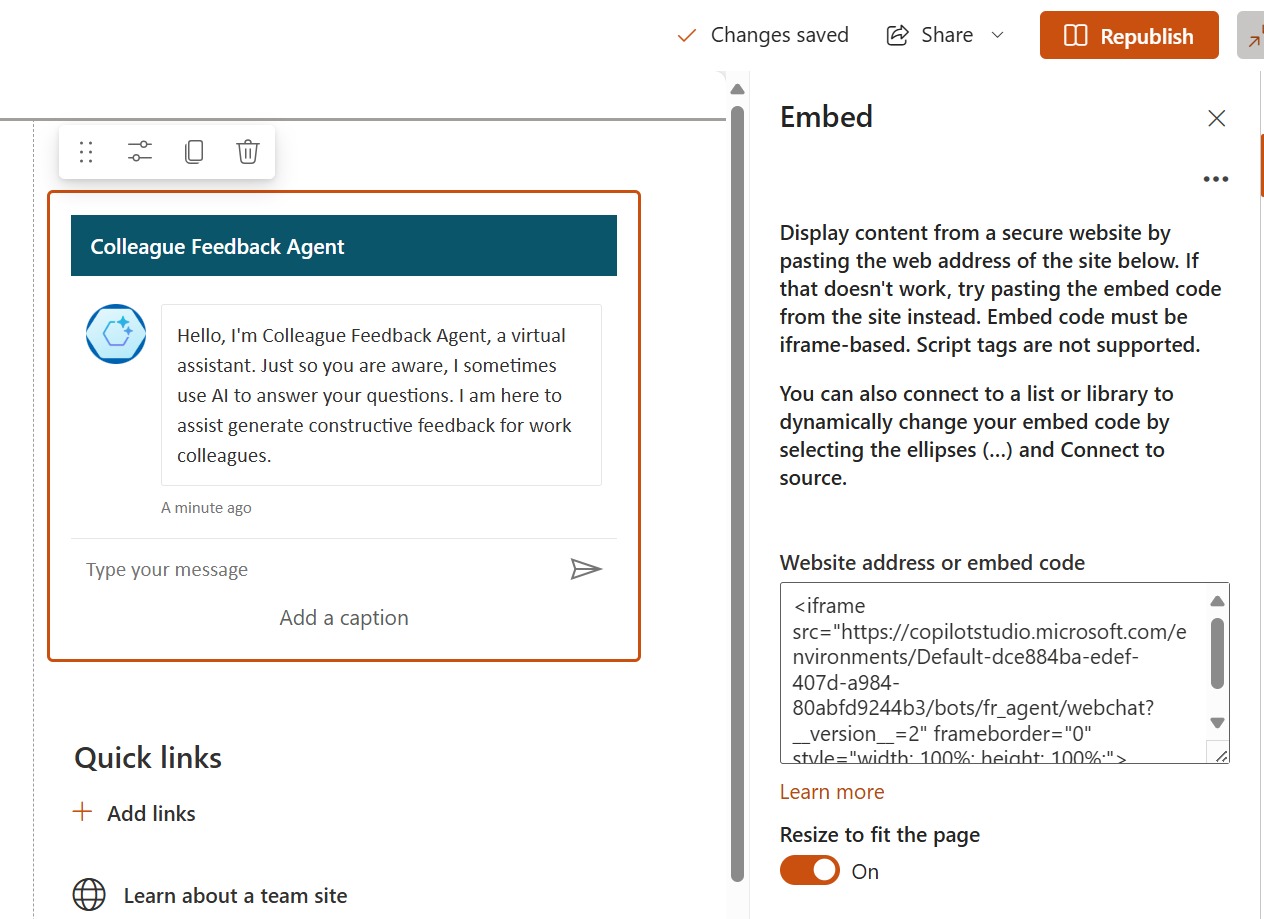
3. Add the Embed Webpart to a SharePoint Page
- Navigate to the SharePoint page where you want to embed the agent.
- Edit the page and add an Embed Webpart.
- Paste the link copied from the Copilot Studio Custom Web Site channel into the Embed Webpart.
4. Publish the Page
Once the link is added, publish the page. The Copilot Studio Agent will now render directly within the SharePoint page, ready for users to interact with.
Benefits of Using OOB Features
Using OOB features like the Embed Webpart eliminates the need for custom development, making it easier and faster to integrate Copilot Studio Agents into SharePoint pages. This approach is ideal for organizations looking for quick and simple solutions without relying on SPFx or custom code.
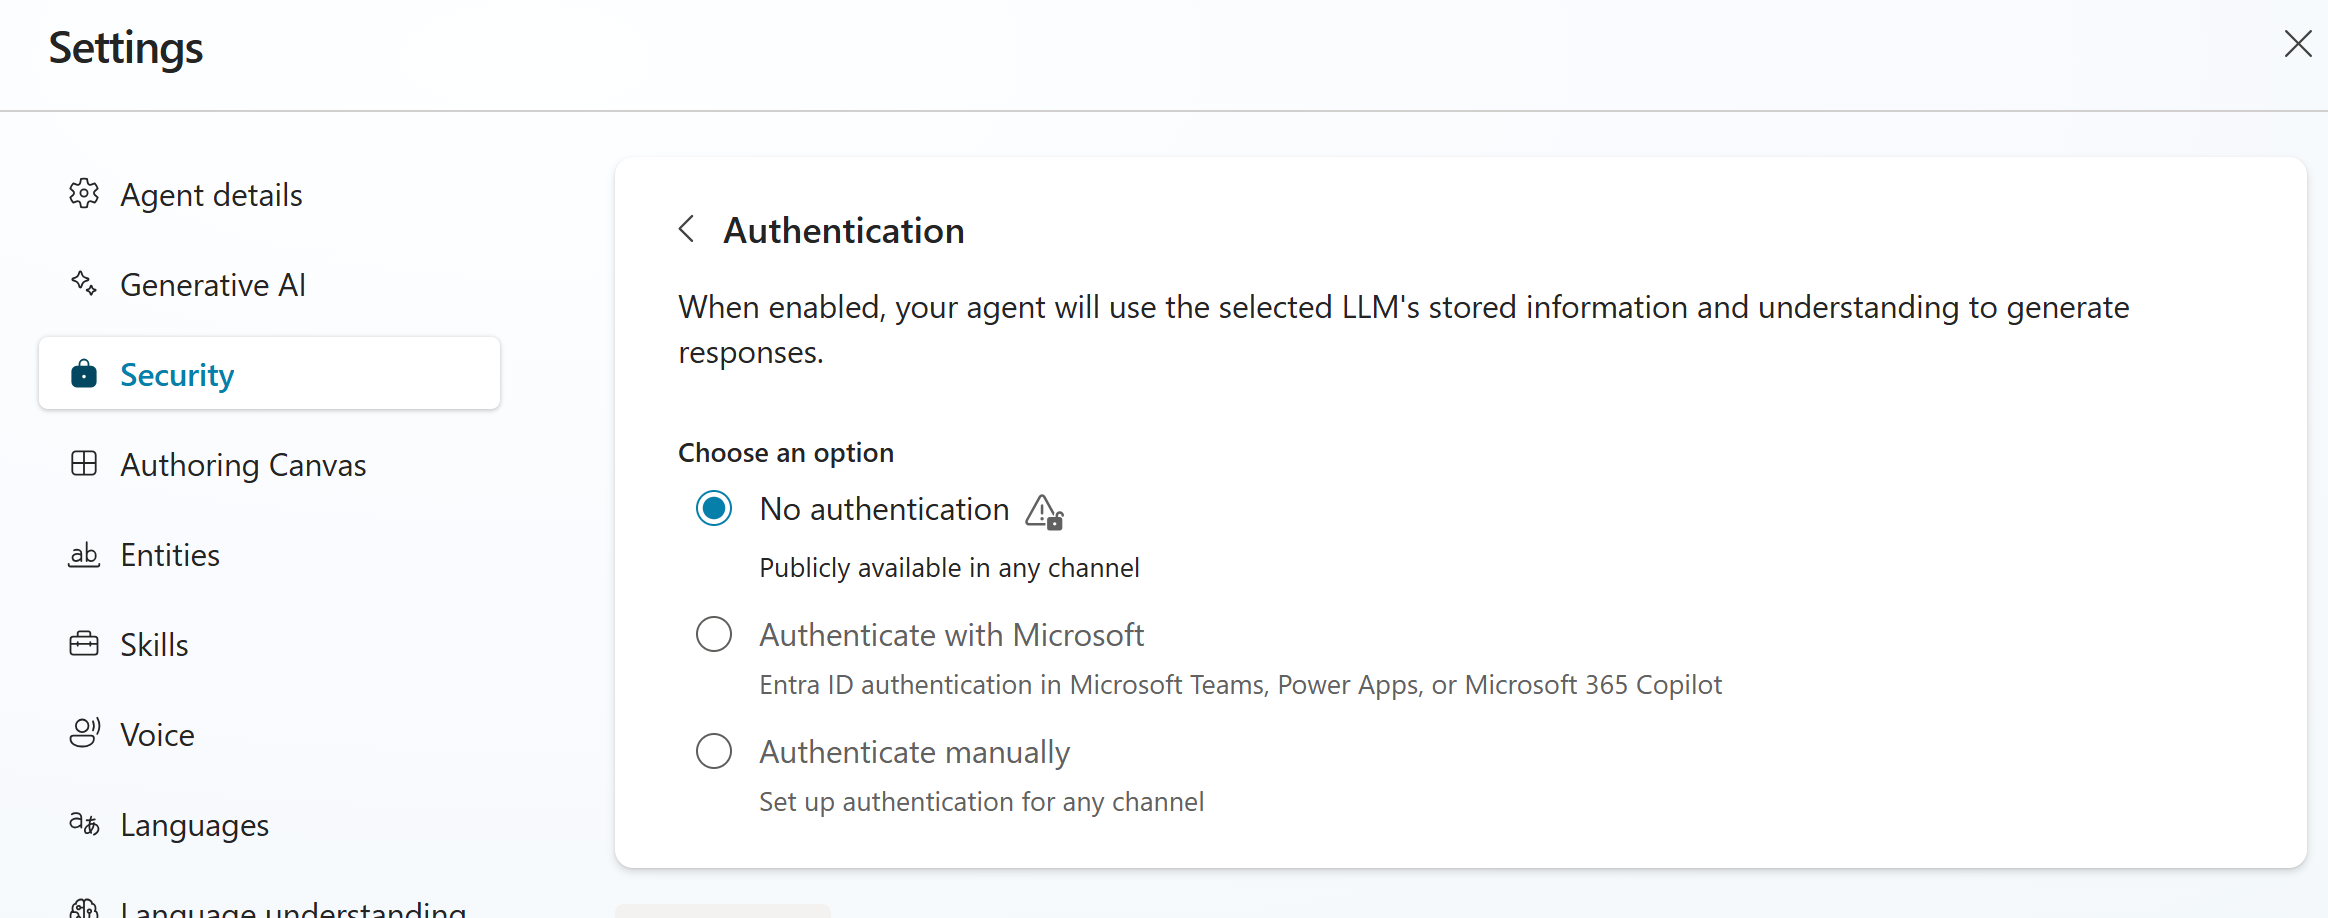
Authenticattion
However to embed the Copilot within SharePoint Page, the authentication has to remain “no authentication”.
References
- Copilot in Search Page by Mohammed Amer
- SPFx Web Parts React Copilot HR Assistant by Nishkalank Bezawada
- Allow or restrict the ability to embed content on SharePoint pages
- https://learn.microsoft.com/en-us/microsoft-copilot-studio/configuration-end-user-authentication